After you’ve sent me the information above, I will set up the email addresses and have them forward to the corresponding Gmail addresses. I will also send each of these Gmail addresses an email with the password for the associated email account. Once you have received your email password, follow the steps below to set up your email alias so that your outgoing mail from your Gmail account will be labeled as coming from your custom email address (e.g. joe@joescoffeeshop.com). This is called an “Alias.”
- Log in to your Gmail account
- Click on the cogwheel icon:

- Select Settings
- Select the Accounts and Import tab
- Select Add another email address under the section entitled Send mail as:
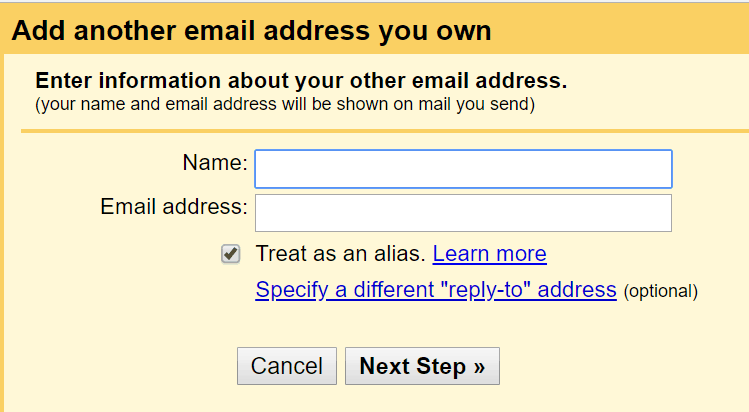
- In the resulting pop-up window, type the name associated with the account (e.g. Joe Smith) and the email address (e.g. joe@joescoffeeshop.com), then click Next Step.
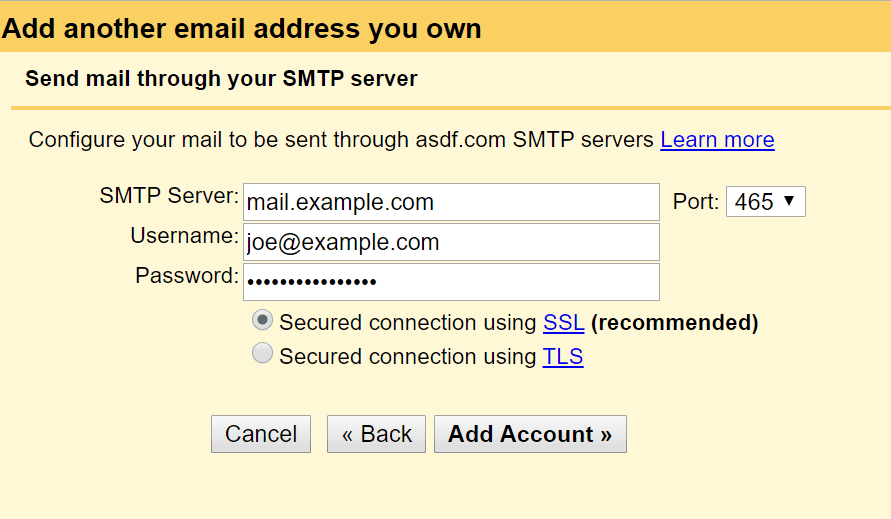
- On the next page, enter the following information:
- For the SMTP Server, type your website name preceded by “mail.” For example, if your website is joescoffeeshop.com, you will enter mail.joescoffeeshop.com.
- For the Username, enter your email address (e.g. joe@joescoffeeshop.com)
- For the Password, enter the password that I sent you for this email address.
- Change the Port number to 465.
- Click Add Account.
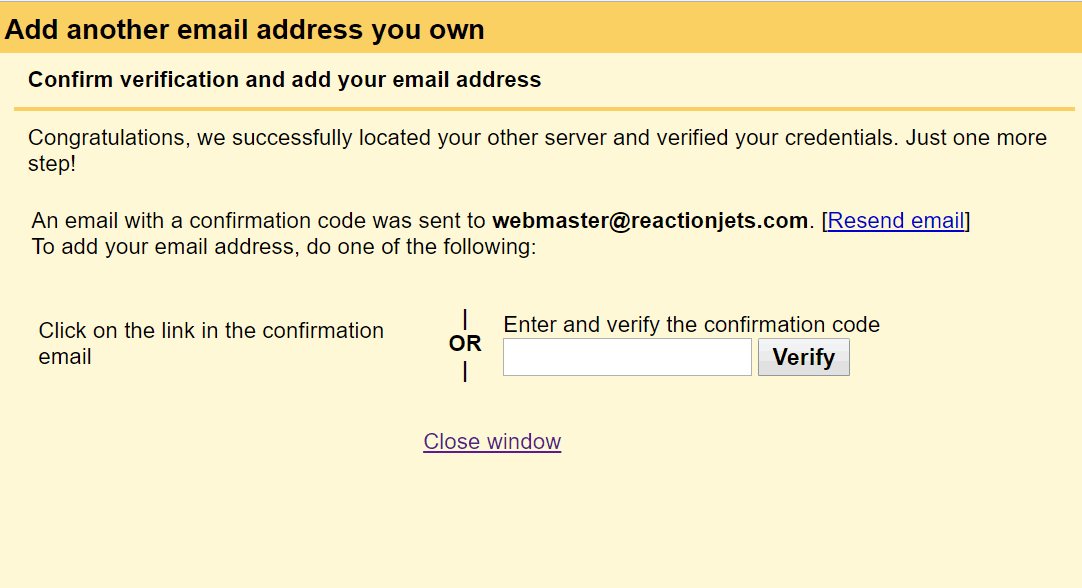
- At this point, an email should be sent to you with a verification code. Enter the code on the next page:
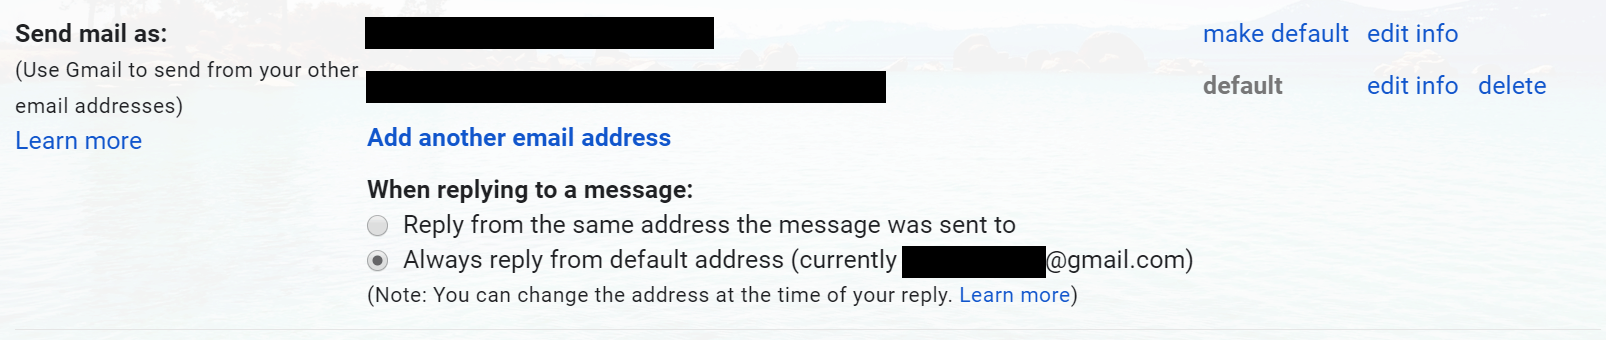
- Finally, back in the Settings > Accounts and Imports tab, find your new email address and select make default. Now you should be able to send email from your Gmail account and it will appear with your website’s domain name (e.g. joe@joescoffeeshop.com). You may also want to select Always reply from default address so that you will always send email from your branded email address.1